Let’s take a look at the Perfectly Clear interface to understand its key elements.
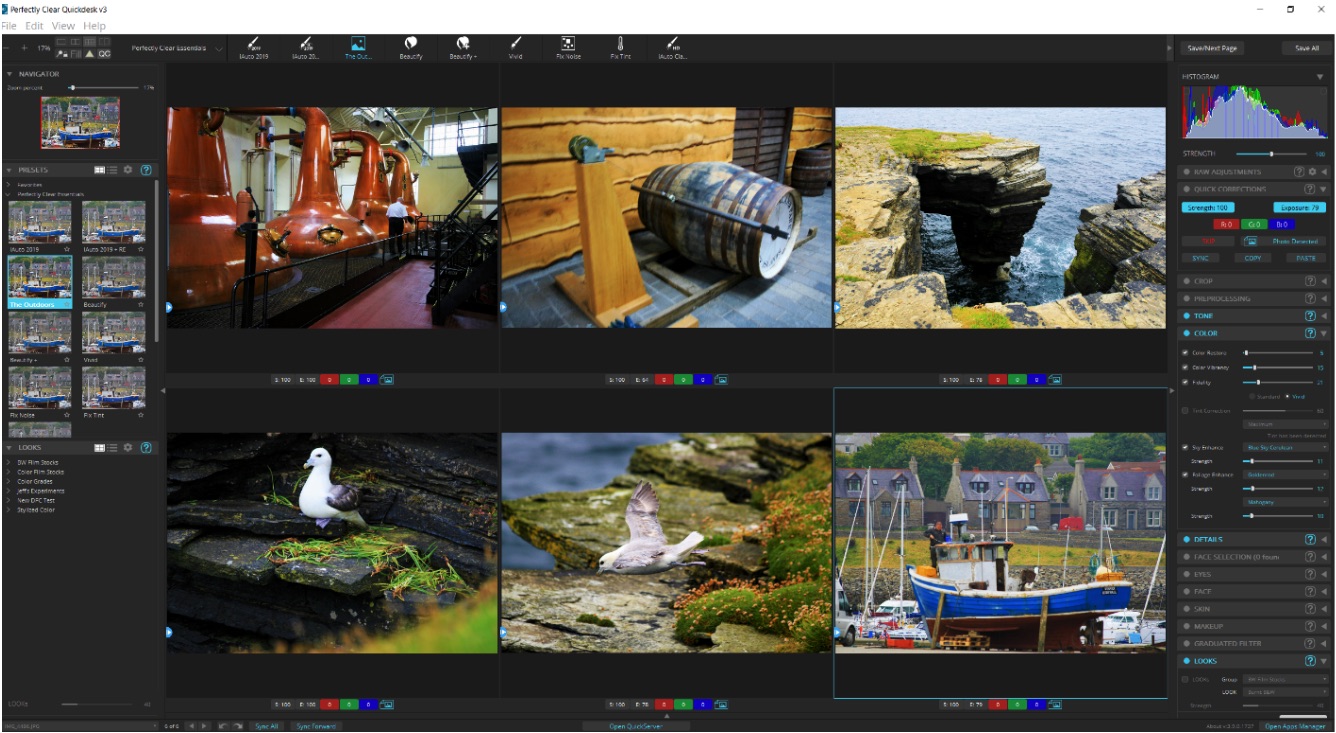
Preview Panel
This is the main section in the application where the image preview is shown. It can show a single image, or a page of 6 images. The preview has a few separate modes that are controlled with the 'View Controls' described below.
Zoom and View Controls
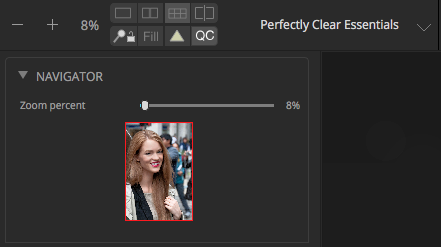
1.Zoom Controls - click the minus or plus to zoom out or in.
2.Double-click on the zoom number (16% in this example) to toggle between 100% and "fit to screen".
3.View Mode buttons – these control the Preview Window in Perfectly Clear. From left to right, the buttons are: Split View, Dual Image View, 6-Up View, 50/50 Split.
a.Split View shows a single image with the corrected image on the right, and the original on the left.
b.Dual Image View shows both the original and corrected and images side by side.
c.6-Up View allows fast viewing of 6 images at a time
d.50/50 Split will switch to Split view and re-centers the before/after slider to the middle of the view.
4.The 'Navigator' shows the full image you are working on, with the area that is in the preview panel outlined in red. Click and drag the red rectangle to pan your image to a different area.
5.Drag the zoom slider to zoom in or out.
The second row of buttons in the View Mode area control the following:
1.Zoom Lock - when in 6-Up View, changes to the zoom of any one image will also change the other 5 preview images in the same way.
2.Fill View - when enabled, the preview images will zoom in such that the preview area is filled with the image. When disabled, the image is zoomed to "fit", meaning the full image area will always be shown.
3.Clipping Warning - when enabled, white/black clipping will always be shown in all 6 preview images.
4.QC - when enabled, all 6 Quick Correct buttons will be shown below the images. When disabled, only the one active image will show the Quick Correct buttons.
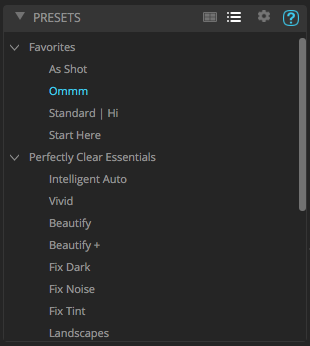
Presets Bar
The selection on the left, showing "Perfectly Clear Essentials", allows you to select which Preset Group is visible.
1.To the right are icons for each of the Presets in the selected Group. Click on an icon to select that Preset and apply those settings to the current photo. If there are more Presets than will fit, a left or right arrow will appear to allow you to scroll through the list.
Presets and LOOKs Panels
|
These panels shows all Preset Groups and the Presets they contain. These two icons: Click the Gear icon in the header to see the following menu of items:
•Add or edit a preset: Save the current image settings as a new preset. You can edit an existing preset by just using the same preset name as the preset you'd like to edit. •Add a group: Create a new, empty preset group so you can organize your custom presets. •Export presets: Save the currently selected preset or preset group to a ".preset" file. This makes backing up or sharing your custom presets quick and easy. •Import presets: Import a ".preset" file that you previously exported •Buy More: Open the Apps Manager to browse through currently available Add-ons for purchase
|

Status Bar
![]()
This status bar allows you to quickly switch between several images that are opened at once. The dropdown allows you to select from all open images, and the left & right arrow buttons allow you to quickly proceed to the next page of photos .
The next two buttons will Undo and Redo your recent actions.
Sync ALL will apply the current settings to all open photos.
Sync Forward will apply the current settings to all photos after the current one.
FilmStrip

The filmstrip can pop up or disappear on the bottom of the application window and you can view all the photos from your open order, and click any one of them and the screen will load that photo or 6 photos. Note that photos won’t be saved and closed by doing this. Very useful for navigating through a sets of images.
Tools Panel
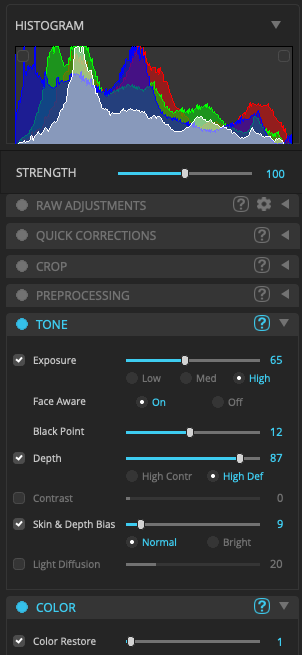
Quick Correct
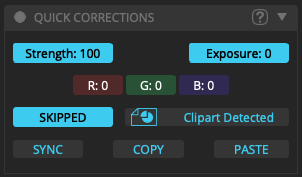
The “Strength” and “Exposure” buttons are the same as the strength and exposure sliders - just in button form. The R, G, and B buttons allow adjustment to individual color channels.
These buttons respond to the following actions:
•Left-Click to increase correction by 5
•Right-Click to lower correction by 5
•SHIFT-left-click or SHIFT-right-click to change by 1
•ALT-left-click or ALT-right-click to set to min or max (option on Mac)
•CTRL-click (CMD+click on Mac) to reset to 0 (strength = 100, exposure = preset value)
These same buttons will appear under the active image (or under all images if the "QC" option is enabled in the top left).
The SKIP button allows you to quickly disable ALL corrections on the selected photo. The image will still be saved in the output folder, but with no image corrections applied.
SYNC will apply the current settings to all subsequent images. This will NOT change the settings on any previously viewed photos.
COPY and PASTE act exactly like the Edit menu options. If you’d like to apply a different preset or specific manual corrections to just a few images, press copy and then paste to the desired image to apply (only one at a time)
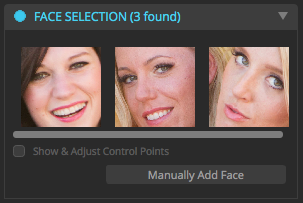
Face Selection Tool
|
The corrections applied by many of the tools in the Eyes, Face, Skin and Makeup Groups apply their corrections only to faces that have been identified in your photos. This Face Selection Tool allows you to see which faces were automatically identified. Clicking on one of the faces will zoom the preview image to that face. See the chapter on the Face Selection Tool for additional detail. |