Let’s take a look at the Perfectly Clear interface to understand its key elements.
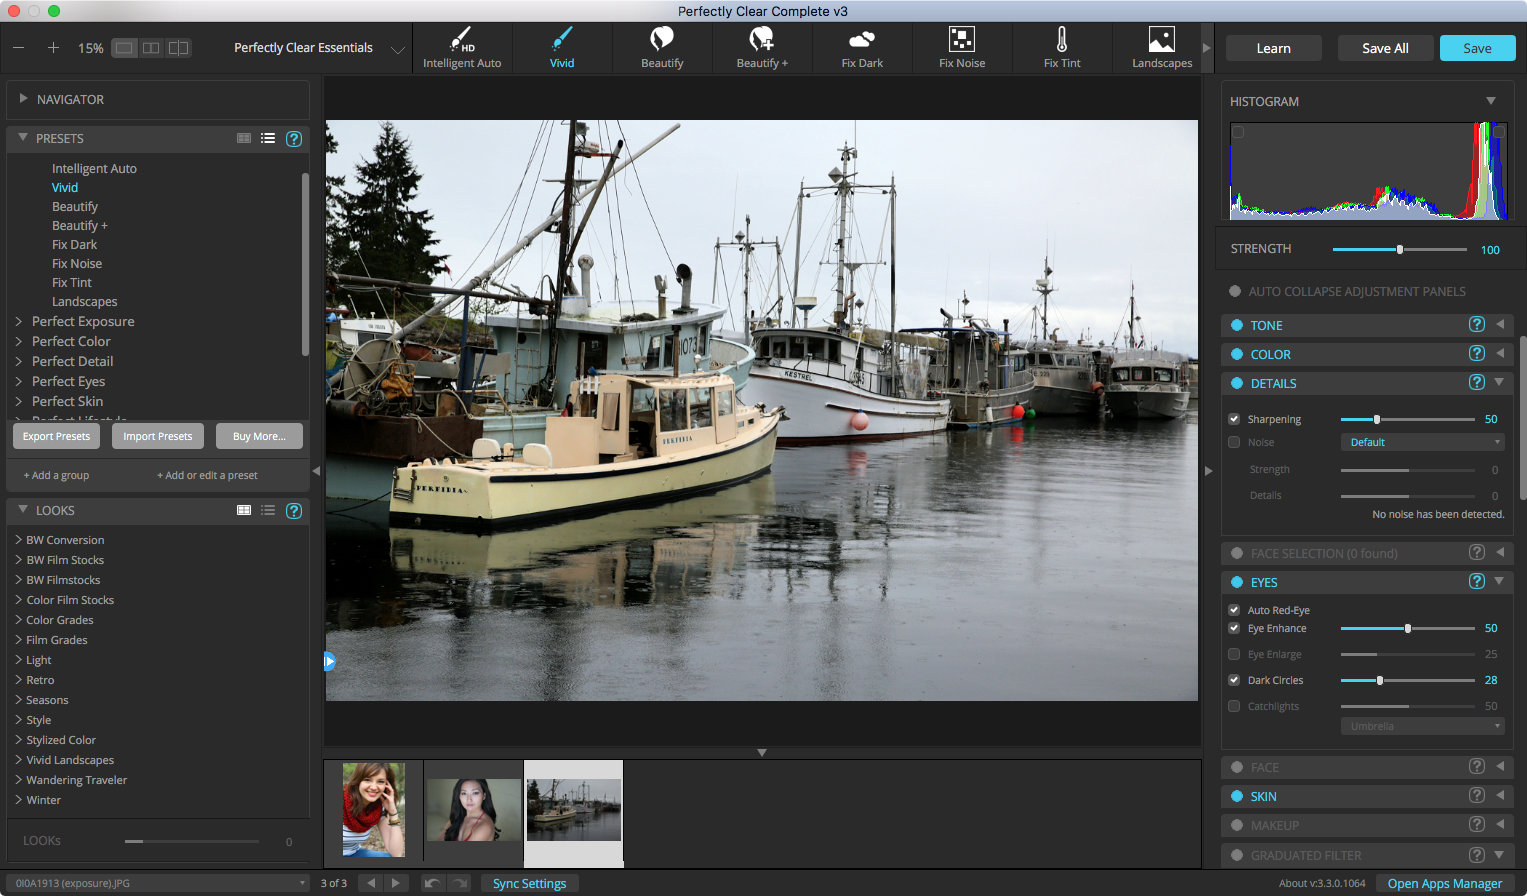
Preview Panel
This is the main section in the application where the image preview is shown. The preview has a few separate modes that are controlled with the 'View Controls' described below.
Zoom and View Controls
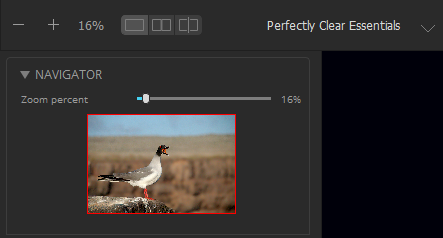
1.Zoom Controls - click the minus or plus to zoom out or in.
2.Double-click on the zoom number (16% in this example) to toggle between 100% and "fit to screen".
3.View Mode buttons – these control the Preview Window in Perfectly Clear. From left to right, the buttons are: Split View, Dual Image View, 50/50 Split.
a.Split View shows a single image with the corrected image on the right, and the original on the left.
b.Dual Image View shows both the original and corrected and images side by side.
c.
d.50/50 Split will switch to Split view and re-centers the before/after slider to the middle of the view.
4.The 'Navigator' shows the full image you are working on, with the area that is in the preview panel outlined in red. Click and drag the red rectangle to pan your image to a different area.
5.Drag the zoom slider to zoom in or out.
Presets Bar

1.The selection on the left, showing "Perfectly Clear Essentials", allows you to select which Preset Group is visible.
2.To the right are icons for each of the Presets in the selected Group. Click on an icon to select that Preset and apply those settings to the current photo. If there are more Presets than will fit, a left or right arrow will appear to allow you to scroll through the list.
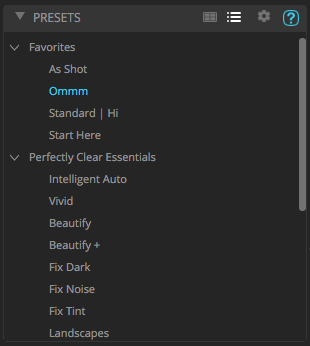
Presets and LOOKs Panels
|
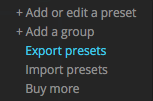
These panels shows all Preset Groups and the Presets they contain. These two icons: Click the Gear icon in the header to see the following menu of items:
•Add or edit a preset: Save the current image settings as a new preset. You can edit an existing preset by just using the same preset name as the preset you'd like to edit. •Add a group: Create a new, empty preset group so you can organize your custom presets. •Export presets: Save the currently selected preset or preset group to a ".preset" file. This makes backing up or sharing your custom presets quick and easy. •Import presets: Import a ".preset" file that you previously exported •Buy More: Open the Apps Manager to browse through currently available Add-ons for purchase
|
Status Bar
![]()
This status bar allows you to quickly switch between several images that are opened at once (only available in the Lightroom plugin). The dropdown allows you to select from all open images, and the left & right arrow buttons allow you to quickly proceed to the next photo.
The next two buttons will Undo and Redo your recent actions.
Sync ALL will apply the current settings to all open photos.
Sync Forward will apply the current settings to all photos after the current one.
FilmStrip

The filmstrip can pop up or disappear on the bottom of the application window and you can view all the photos from your open order, and click any one of them and the screen will load that photo or 6 photos. Note that photos won’t be saved and closed by doing this. Very useful for navigating through a sets of images.
Tools Panel
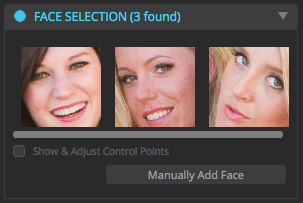
Face Selection Tool
|
The corrections applied by many of the tools in the Eyes, Face, Skin and Makeup Groups apply their corrections only to faces that have been identified in your photos. This Face Selection Tool allows you to see which faces were automatically identified. Clicking on one of the faces will zoom the preview image to that face. See the chapter on the Face Selection Tool for additional detail. |
