Photoshop is designed to work on images one at a time. But, with the help of Actions, you can quickly develop a very fast batch processing workflow. An Action in Photoshop is like a script – first your record the steps you want to automate, then you can “play” those steps on one image or on hundreds.
|
|
Here’s the process to record an Action to automatically apply Perfectly Clear:
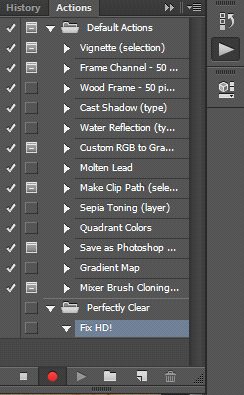
1.Open the Actions Window in Photoshop (Window -> Actions).
2.Create a new Action Set by clicking the folder icon at the bottom of the Actions Window. Name it anything you want, for example ‘Perfectly Clear’.
3.Create a new Action in that Set by clicking the New Action button, and give it a name, for example ‘Fix HD!’.
4.When the new action is created, it will start recording automatically. All the steps you do in Photoshop or in the Perfectly Clear plugin will be recorded, so just open the Perfectly Clear plugin, apply the Fix HD! Preset, and click OK to return to Photoshop.
5.Once you are back in Photoshop – remember to stop recording the Action by clicking the stop icon (far left) in the Actions window.
That’s all there is to it. You can create separate Actions to apply different Presets, or you can switch to the Tweak panel and apply specific corrections that are not part of a Preset. Record each of these as its own Action.
If you make a mistake, simply stop recording, delete the action (last icon at the bottom of the Actions Window) and start again from Step 3 above.
Once your actions are created, it’s simple to run this action on a large number of photos. You can do this within Photoshop from the File -> Scripts -> Image Processor tool, or you can do this from Adobe Bridge.
From Image Processor:
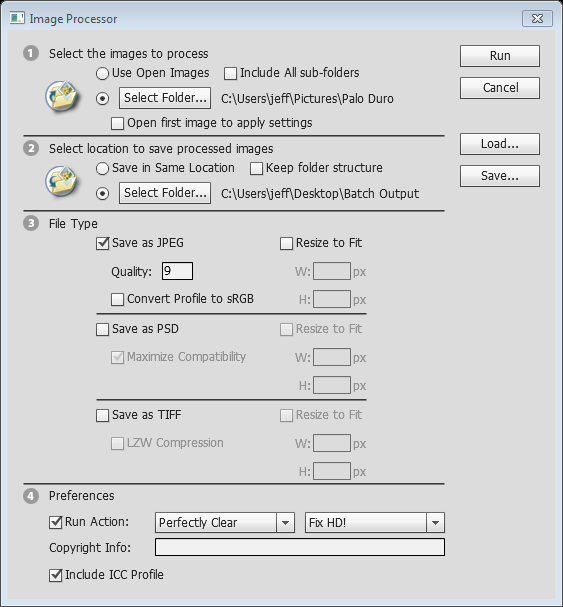
The Image Processor window itself will step you through this process.
1.In the first section, choose the images to work on. Select an entire folder of images, or select “Use Open Images” to run the Action on all images that are currently open in Photoshop.
2.Next, choose the folder where the corrected images should be saved to.
3.Choose the final image format. You can create multiple versions of each file in different formats if you check multiple rows in this section.
4.Finally, at the bottom, click ‘Run Action”, then select the Action Set you created, and then select the specific Action you want to apply (Fix HD!).
Click ‘Run’ and Photoshop will open every file that it supports in the folder you selected, apply the Fix HD! Preset in Perfectly Clear, then will save the images in the format you selected to the folder you selected.
From Adobe Bridge:
1.Open Bridge and select the files you’d like to process
2.Select Tools -> Photoshop -> Batch
3.Photoshop will open and the Batch window will be shown:
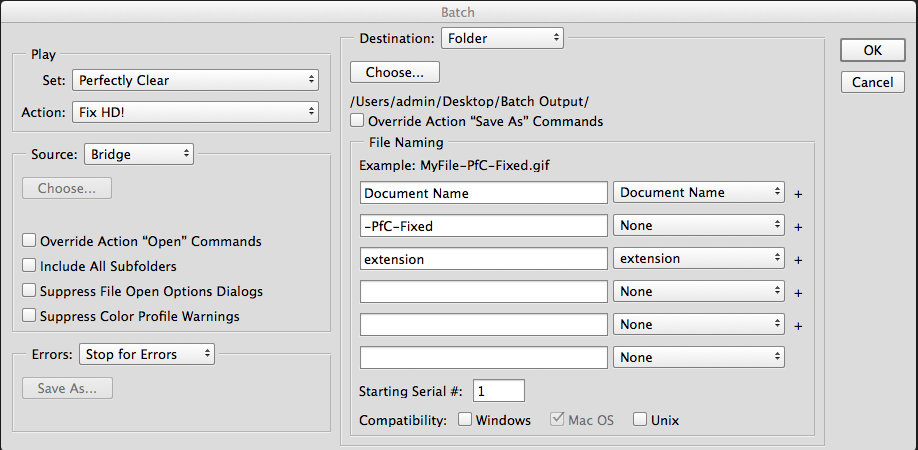
4.Choose the options in the Batch window to match how you’d like to process your photos:
a.Play: choose Perfectly Clear and the Fix HD! Action
b.Source: the default will be ‘Bridge’ which means the images you had selected in Bridge will be processed. You can change this to work on files in a specific folder, or process the images currently open in Photoshop
c.Destination: choose ‘Folder’, then click ‘Choose’ to pick the location to save your images to. If you choose the ‘None’ option, the images will remain open in Photoshop – so be careful if you choose this with very many images selected.
d.File Naming: set the filename parameters any way you like.
Click ‘OK’ and the batch processing will start with each image you selected in Bridge.