We store files for one week, then automatically delete them from the system.
Read moreHow do I test AI Image Upscaling?
Thanks for your interest in AI Image Upscaling! Testing this service is easy — follow these simple steps.
In order to start testing, make sure you’re signed up for an account.
Recommendations for testing:
As with all AI-based technology, there are certain parameters that work best based on the training and abilities of the artificial intelligence. If you have specific upscaling needs, let us know!
- An entirely new groundbreaking model which creates natural and beautiful faces and eyes (including pupil look), while also removing noise and compression artifacts throughout the image.
- Also a new model optimized for tiny faces and logos
- AI Upscaling works best on small images that are around 1 MP in size.
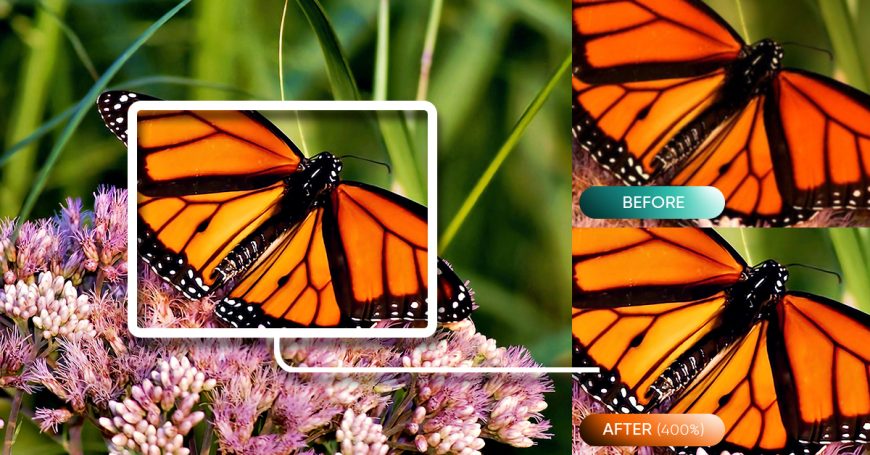
- Optimal results occur when you upscale by 400%
- Best results occur when both AI Image Upscaling and automatic image enhancement is applied, so we highly recommend testing with both turned on
- This iteration of AI Image Upscaling was specifically created to resize small, consumer images that may have been downscaled by social media, screenshots, or sharing. If you have a different use case, let us know!
Step 1: Create a Cloud account
AI Image Upscaling is available in our Cloud platform. Create a free account here to get started.
Step 2: Start a new job
Once you’ve logged into your Cloud account:
- Click the “Jobs” tab on the right
- Load in the images that you would like to upscale (see our recommendations around sizing above)
Step 3: Name your job and choose your parameters
- Choose a descriptive title for your job
- Choose your AI Scene Detection Model for Color Correction in the first dropdown (learn more about choosing the correct AI Scene Detection Model here)
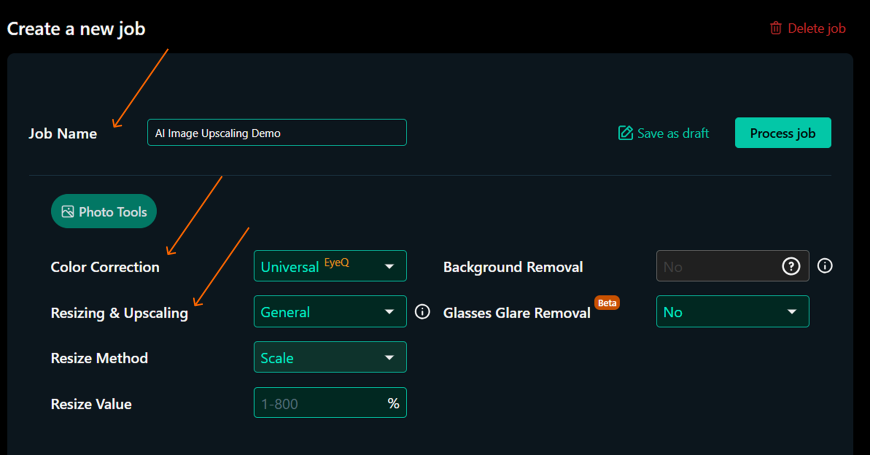
Step 4: Choose your AI Image Upscaling parameters
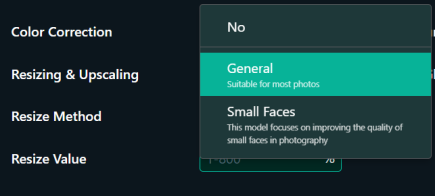
With AI Image Upscaling 2.0, there are two resizing and upscaling models you can choose from:
- General: This is our default model, designed for robust performance. It excels at removing noise and artifacts, producing natural, detailed faces and eyes.
- Small Faces: This model is optimized for images with small faces (think big group photos from afar) and crystal-clear logos.
Choose your model under the “Resizing and Upscaling” dropdown.
Perfectly Clear Cloud provides multiple options to upscale or resize your images. Here’s what you need to know. These parameters are all found under the “Resize Method” dropdown.
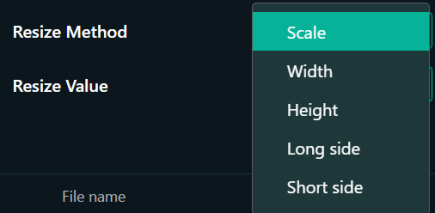
- Original size – Your image will not be upscaled or resized and will remain its original size
- Scale – Use this if you’d like to resize based on a percentage (for example, we recommend upscaling by 400%)
- Width – Use this if you have a specific width you would like your images to be. The height will be automatically calculated to maintain the aspect ratio.
- Height – Use this if you have a specific height you would like your images to be. The width will be automatically calculated to maintain the aspect ratio.
- Long side – Use this if you have a specific size you’d like the “long side” of the photo to be. The “short” side of the photo will be automatically calculated to maintain the aspect ratio.
- Short side – Use this if you have a specific size you’d like the “short side” of the photo to be. The “long” side of the photo will be automatically calculated to maintain the aspect ratio.
Step 5: Process your job
Simply click the “Process job” button to begin processing.
Depending on your parameters, sizing, etc, it may take a few minutes to process your images (on our last internal test, it took about 12 minutes to process 71 images enhanced and upscaled at 400%).
Step 6: Download your zip file and assess!
Now’s the fun part! Once your files have processed, download your zip file and see how they turned out.
Contact us with any questions
Please contact us if you have any questions, requests or would like a detailed walkthrough of AI Image Upscaling.