Our Image Quality Team uses Selective Color to tune presets to your desired output, ensuring we can meet your image quality needs. Selective...
Read moreEverything you need to know about downsizing in a QuickServer hot folder channel
If you’re using QuickServer version 5.0.0 or later, please refer to this guide. The information below applies to version 4.9.9 and earlier.
How do I check my version number?
You can find the version number in the top left-hand corner of the QuickServer application window.
How do I update to the latest version?
1. Launch QuickServer.
2. Click the version number in the top left-hand corner.
3. Click the Update button.
The downsizing feature allows you to decrease the dimensions of your images according to your specific requirements. It gives you flexibility in downsizing your images while maintaining or altering the aspect ratio based on your preferences.
How do I set up downsizing?
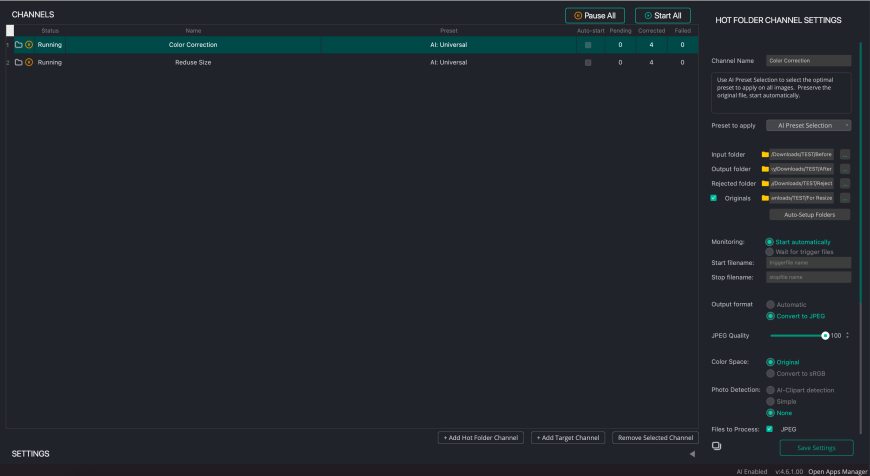
Step 1: Open QuickServer and click the type of the channel that you would like to set up
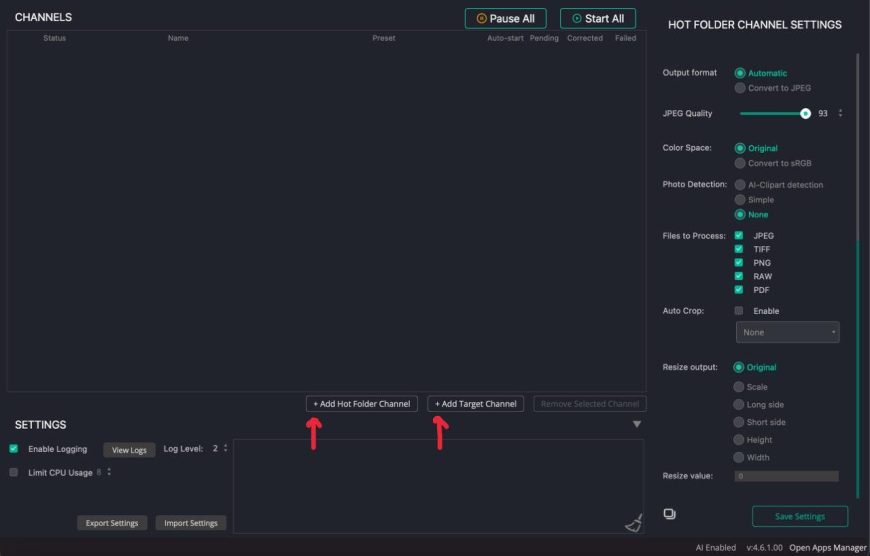
Step 2: Set up the Input, Output and Rejected folders.
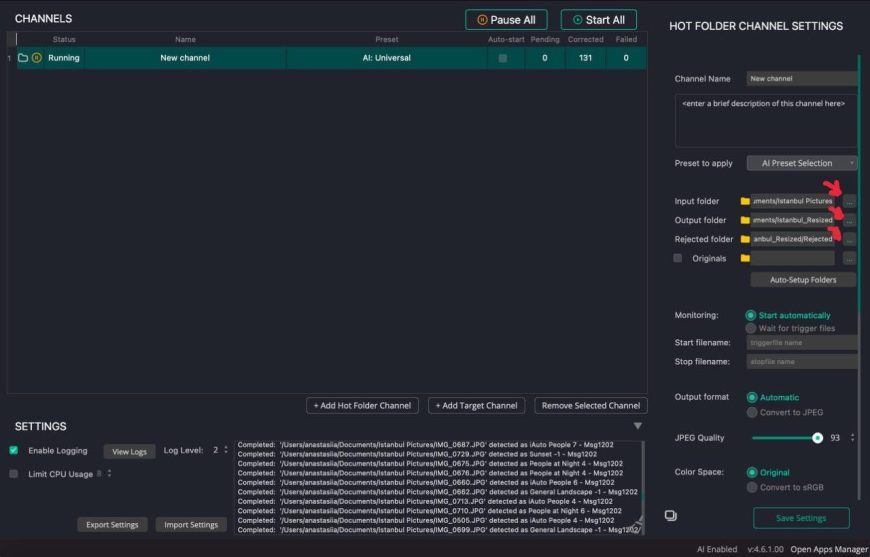
Step 3: In the right-hand menu, scroll down until you see the “Resize output” section
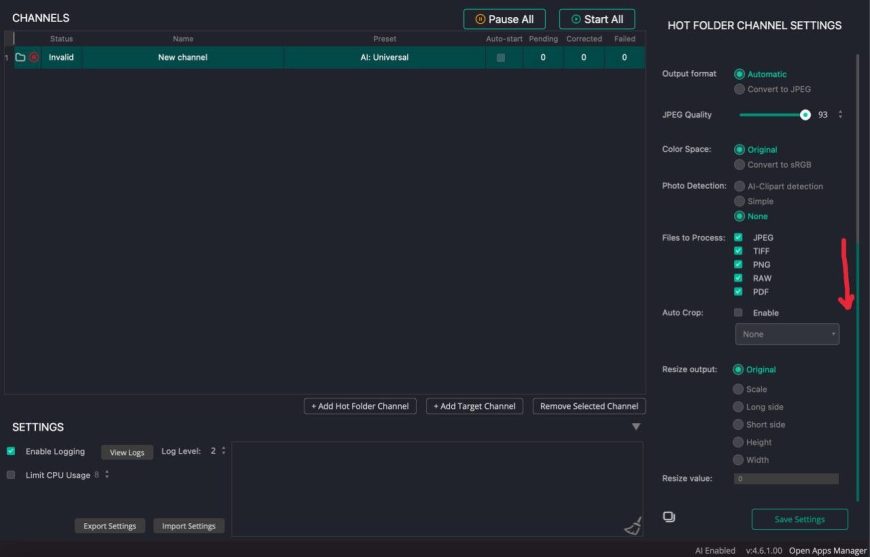
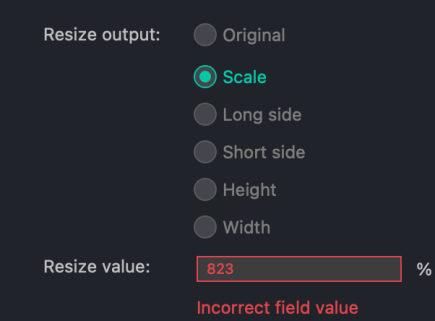
Step 4: Choose how you’d like to define resizing (Scale/Long side/Short side/Height/Width), then input the desired value in the “Resize value” field.
Downsizing Options
- Original: Keeps the image in its original dimensions without reducing it.
- Scale: Reduce the image by a specified percentage, reducing its size proportionally.
- Long side: Reduces the image so that its longest side matches a specified dimension, with the other side adjusted proportionally.
- Short side: Reduces the image so that its shortest side matches a specified dimension, with the other side adjusted proportionally.
- Height: Sets the height of the image to a specific value (up to original size of the image), with the width adjusted proportionally to maintain the aspect ratio.
- Width: Sets the image’s width to a specific value (up to original size of the image), with the height adjusted proportionally to maintain the aspect ratio.

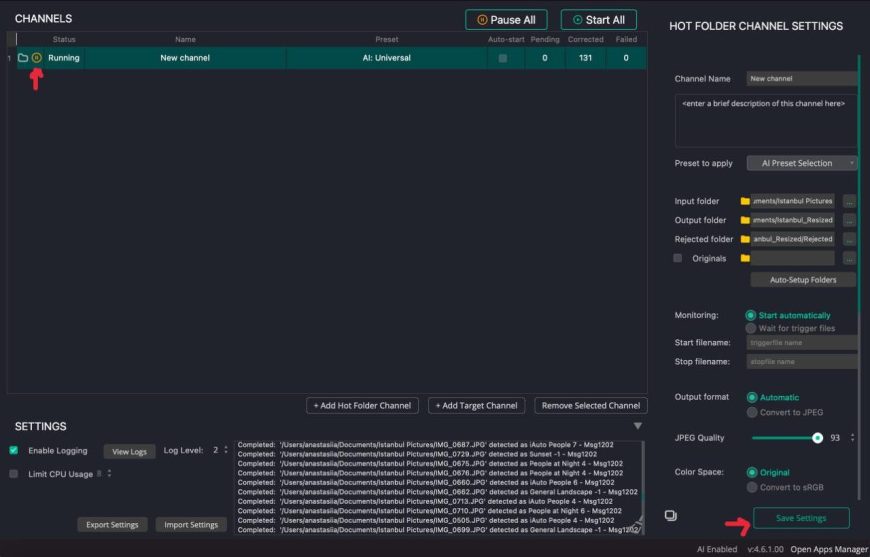
Step 5: Click “Save Settings”. Your channel is now set up!
How to make images of multiple sizes using 2 channels:
Since after processing an image it disappears from the input folder, you will need to make duplicate images to work with them again.
Let’s imagine that you have 2 channels with different size reduction values. In our example they are Color Correction and Reduce Size.
Step 1: Switch on the Originals images folder in the first channel. Choose a path and name the folder differently. (e.g. For Resize)
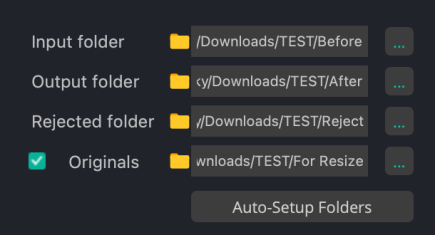
Step 2: Select the Input folder you specified as Originals (For Resize), from this folder the second channel will take these images again.
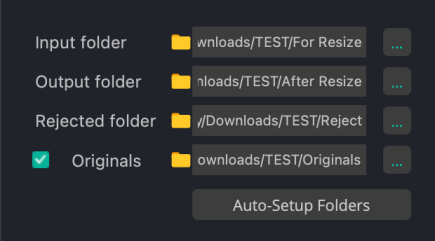
Step 3: If you need original images, switch on the Originals folder in the second channel.
Frequently asked questions about QuickServer downsizing
Q: What values can I use for each downsizing option?
A: See the values below for each of the different downsizing options.
- Original: The image will not be reduced.
- Scale: You can enter a value from 1% to 100%. Please make sure that QuickServer won’t output the image less than 32px. Example: if the original image was 40px*40px and after downsizing became 10px*10px, the image won’t be output.
- Long Side: You can set the longest side of the image from 32px to 10 000px.
- Short Side: You can set the shortest side of the image from 32px to 10 000px.
- Height: You can set the height from 32px to 10 000px.
- Width: You can set the width from 32px to 10 000px.
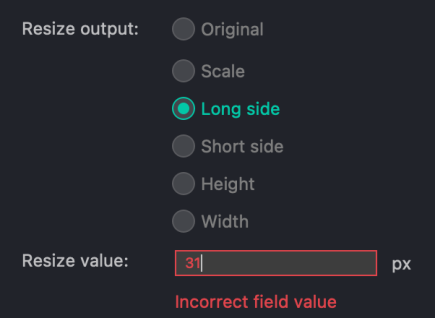
Q: The field is red and shows the error “Incorrect field value”
A: Please refer to the allowable parameters for the reduce size tool:
Scale: Available values of the parameter: 1-100%
Long Side: Available values of the parameter: 32 – any px
Short Side: Available values of the parameter: 32 – any px
Height: Available values of the parameter: 32 – any px
Width: Available values of the parameter: 32 – any px
If the data entered is correct and you continue to see an error, please contact us.
Q: If the uploaded photos are smaller than I specified in the values, what happens to the photo?
A: This tool only works to reduce the size. If the uploaded image is smaller than the specified settings, the resize settings will not be applied to it.
Q: What do I do if I need to get multiple sizes?
A: You can duplicate or create a new channel and change only the settings to reduce the size of the image. In this case you will get 2 or more different channels with different resize settings. Don’t forget to change the Output folder if you want different size files from another channel to be in a separate folder.