From heart-pounding rides and character encounters to unforgettable sights, every moment in a theme park, attraction, or tourist site holds the potential to...
Read more
Here’s How To Have the Best Lighting for Background Removal for Studio Portraits
Our Background Removal solution can work on any background and in a variety of lighting conditions, but here’s how to get the best results for extraction in a studio setting or school portrait setting.

Lighting
Use Two Lights
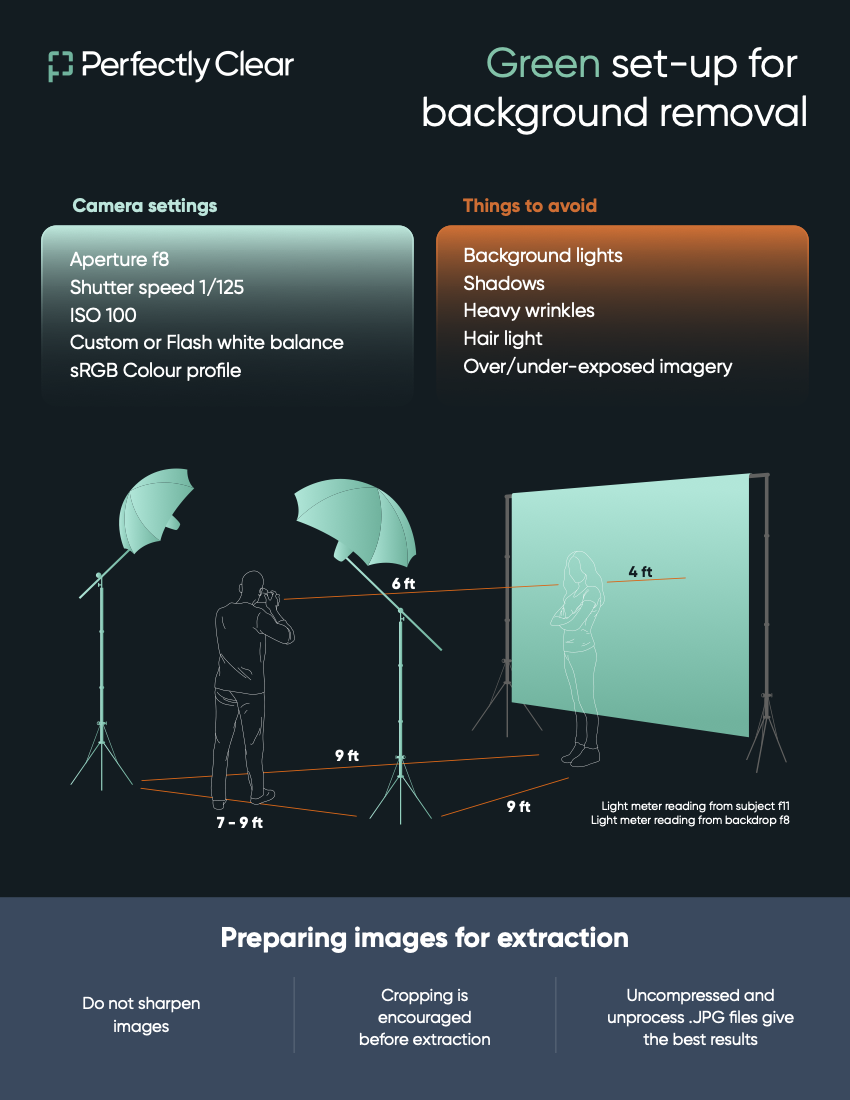
When lighting a studio setting for future Background Removal, we recommend using two lights. Place each light on each side of the person you are photographing. This allows the light to be balanced and decrease the amount of shadows.
Lighting Position
Shadows can cause complications with Background removal, so we recommend positioning your lights so the shadows can be pushed out of the frame. Make sure your lights are higher than the subject you are photographing. Your lights should be slightly pointed down and at a 45 degree angle between you, the light, and your subject.
Light Metering
Use your spot meter to test the light on each side of your subject’s face, their forehead, and a few parts on your background. Aim for even lighting on the face at F8. The background should be metering one stop below the subject’s face.
Don’t Use Backlights
Backlit portraits can cause a halo around the subject, which causes an issue for automated background removal. This can also cause spill light to bounce into the lens, which causes even more issues.
Using Modifiers
Soft lighting is recommended for portraits that will eventually have the background removed. You can achieve this by using a modifier like a softbox or umbrellas.
Distance from Background
Make sure the marker for your subject is at least four feet from your background. This will ensure spill is minimized as long as the light isn’t hitting the background and bouncing into your lens.
Light Metering
Test the light using the spot meter. Point it at each side of the subject’s face and their forehead, as well as different spots on your background. The light on the face should be even and ideally metering at F8. The background should be metering one stop below the subject’s face.
Test Your Setup & User Perfectly Clear Automatic Background Removal!
Once you have your setup, give it a test. Ultimately, your setup needs to work for you! Background Removal paired with Perfectly Clear automatic image correction is a match made in heaven. Contact us today to learn more!

