Yes. You can save and organize any presets you create.
Read moreHow to export custom AI Preset Groups or individual presets into the SDK, Web API, or Container
In this tutorial you will learn how to create custom presets in order to export to our SDK, WebAPI or Container solutions.
The Easy Way
There are two sections in Workbench: AI Scene Detection and Other Presets. The AI Scene Detection models allow you to use AI to determine the contents of the image and automatically choose the best preset for the image. These groups are made up of multiple presets the AI can choose from. Other Presets are single, individual presets. We recommend AI Scene Detetion because it is more robust, but there is still the option to use one individual preset instead.
AI Scene Detection models
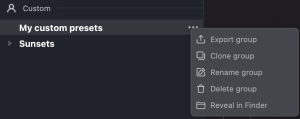
The simplest way to get image correction parameters into any of our business solutions is to export the AI Scene Detection model from Workbench. To do so, select the AI Scene Detection model you would like to use in the SDK, WebAPI, or Container, then switch to List View in the “AI Scene Detection” Panel, then click the three dots, and click Export Preset Group. This will create a file – called Univerasl.preset in the example below – which contains all the presets in the Universal Preset Selection model.

Single presets
To export an individual preset into a .preset file, select the preset you would like to use in the SDK, WebAPI, or Container, then switch to List View in the “Other Presets” Panel, then click the three dots, and click Export Preset.
Give the preset file a useful name, and this saves all the settings in that Preset as a .preset file. These can be loaded in our SDK using PFC_ReadPreset() function, and can be uploaded to our WebAPI or used in our docker Container solution. This can be done in any of our desktop software applications.
The Code Way
For our SDK, there are times when loading all parameters from a .preset file is not the best approach. You might offer a button or feature to your customers to toggle Noise Reduction on or off, for example. In this case, it’s easier to code in a way to enable, disable or set individual image parameters instead of loading in all parameters available in a .preset file.
In these cases, you can use the ‘Export to SDK’ entry in the Edit menu.
This will create a plain text file that includes every parameter in both valid code for both C and C#. It looks like this:
param.core.bEnabled=true;
param.core.bAbnormalTintRemoval=false;
param.core.eTintMode=TINTCORRECT_AGGRESSIVE;
param.core.fTintScale=0.49f;
param.core.bVibrancy=true;
param.core.iVibrancy=0;
param.core.bUseAutomaticStrengthSelection=true;
param.core.eAggressiveness=AGGRESSIVENESS_AGGRESSIVE
With this, you can easily copy/paste this into your source code in any way you need to. A button to enable Noise Reduction would just need to run this line of code:
param.nr.bEnabled=true;
And similar features would be available for Beautify corrections, gradient filters, finishing tools, or any of our other corrections or filters.
This method of exporting settings is available in Workbench.
As always, let us know if you have any questions.