EyeQ’s AI Preset Selection is now available in the Web API! This technology uses machine learning to detect image scenes, categorize them, and...
Read moreHow do I add a preset I already created to an AI Preset Selection Group?
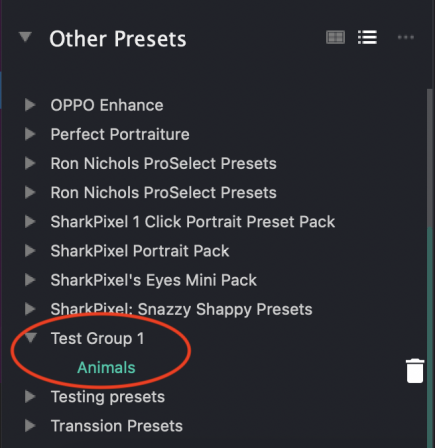
Workbench presets are divided into two sections: the AI Preset Selection section (top) and the Other Presets section (bottom). The AI Preset Selection section is where Perfectly Clear uses AI to detect the scene of an image and apply a preset accordingly.
If you have been experimenting with preset creation and have been saving your presets in a folder in the Other Presets section, or if you were sent a folder of presets by the EyeQ team, here is how to implement them in the AI Scene Detection section.
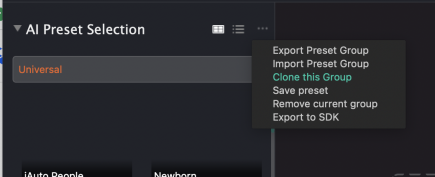
Step 1: Clone the AI Preset Selection Group you would like to use. Make sure you are in the group you would like to clone, then click the three dots and choose “Clone this Group.”
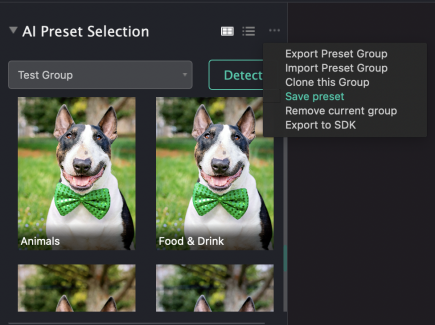
Step 2: Identify the “Other Presets” section presets you would like to replace your “AI Preset Selection” presets with. If you are receiving presets from a team member or EyeQ, you will have to import them. Then, apply the preset to the image. For example, you can see here that we have identified a new “Animal” preset we would like to use.
Step 3: After you have applied your new preset, you’ll replace the preset in the AI Preset Selection section. To do this, click the three dots and click “Save Preset.”
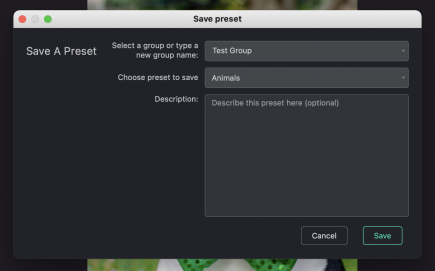
Step 4: You’ll be taken to the screen pictured below. When choosing the group, make sure that you choose the group you cloned in Step 1. When choosing the preset to save, make sure you choose the preset you would like to save over. You can add an option description if you’d like!
Step 5: Now you’re done! Enjoy testing Perfectly Clear’s image quality with your new presets.