AI White Balance was created to solve the difficult challenge of accurate color. Currently, our AI White Balance is included in “Portraits –...
Read moreHow do I use Auto Crop in QuickServer?
If you’re using QuickServer version 5.0.0 or later, please refer to this guide. The information below applies to version 4.9.9 and earlier.
How do I check my version number?
You can find the version number in the top left-hand corner of the QuickServer application window.
How do I update to the latest version?
1. Launch QuickServer.
2. Click the version number in the top left-hand corner.
3. Click the Update button.
Auto Crop, our head cropping and centering tool, is available for use in QuickServer. This FAQ goes over how to set up and use Auto Crop in QuickServer.
Auto Crop effortlessly handles the cropping process based on your specified parameters, ensuring consistent head sizes, eyelines, and gap between the top of the head and top of the photo.
Please note that Auto Crop was designed for portraits that were taken in the same aspect ratio in generally the same distance from the camera, for example a school portrait shoot.
Cost of Auto Crop in QuickServer
Auto Crop can be priced per-image or as a package price. To discuss pricing or start a free trial of Auto Crop, speak with your Solutions Architect or fill out our Contact Us Form.
How to Use Auto Crop in QuickServer
Using our cropping feature in QuickServer is easy — all you need to do is turn it on in the “Tools” section of a channel and choose your Crop Preset. You can either update a current channel or create a new channel.
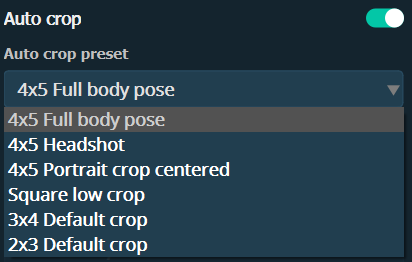
To turn it on, simply scroll to the bottom of the right side until you see “Auto Crop,” then check the “Enable” box. Then, use the dropdown menu to choose a Crop Preset.
Crop Presets
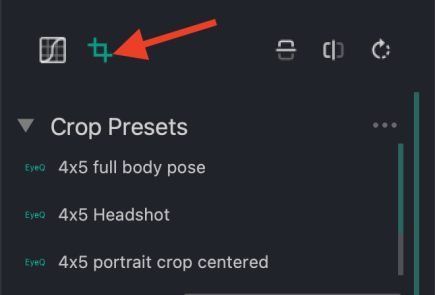
Auto crop presets can be created in Workbench. You can find them in the right side panel under the crop icon.
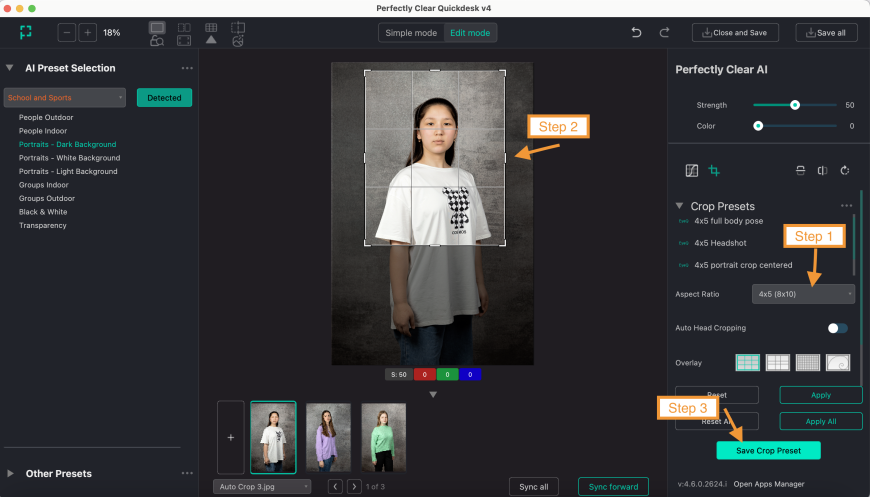
There are several default crop presets to chose from with different aspect ratios. You can also create your own crop presets. To do so, you’ll need to:
- Choose your Aspect Ratio. You can also set your own by choosing the “Custom” option.
- Set your crop by placing the crop where you would like on the image. Please note that this is how you want your set of images to be cropped.
- Click “Save Crop Preset,” give it a name, and you’re done!