We support a variety of popular file types in Cloud. Supported photo file types: JPEG, PNG, WEBP Supported video file types: MP4 and...
Read moreHow do I use or test video in Cloud?
Thanks for your interest in video! Testing this service is easy — follow these simple steps.
In order to start testing, you’ll need our team to give you access in Cloud. Make sure you’re signed up for an account, then contact us to give you access to test video in Cloud.
Step 1: Start a new job
- Click the “Jobs” tab on the left
- Load in the videos that you would like to enhance. You can upload both photos and videos at the same time, but for our purposes, we will only focus on video in this FAQ.
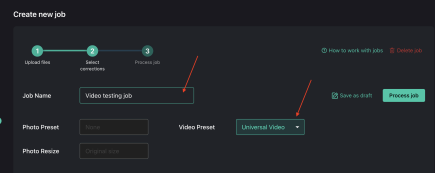
Step 2: Name your job and choose your parameters
- Choose a descriptive title for your job
- Choose your video preset (currently, we only have one preset for video, so no need do anything here… yet!)

Step 3: Process your job
Simply click the “Process job” button to begin processing.
Depending on the length and size of your videos, it may take a few minutes to process.
Step 4: Download your files and assess!
Now’s the fun part! Once your files have processed, download your files and see how they turned out.
Contact us with any questions
Have any questions or want to chat about implementation? Don’t hesitate to reach out to your EyeQ rep or contact us through our website. Updates are always determined by customer feedback, so let us know if you have any questions or requests!
Ready to start using our video enhancement through Web API? Simply check our Web API docs for how to set this up!