Brief Summary We do not directly gather any personal data such as e-mails, first or last names, phone numbers or mailing addresses in...
Read moreHow do I test Auto Crop in QuickDesk?
Thanks for testing Auto Crop!
Before you start testing, please note that Auto Crop is meant to be tested with a consistent set of images that are from the same shoot shot from the same distance. Auto Crop will work with different positions (for example, facing the camera and then facing left) as long as they are in the same aspect ratio and taken from the same distance.
Here’s what you need to know about testing and using Auto Crop.
1. Launch QuickDesk and load in the set of images you wish to crop. You can use any image as a starting point to choose your crop settings.
2. Make sure you are in Edit Mode, then click the crop icon in the right hand panel to open crop settings. Make sure you turn the “Auto Head Cropping” widget to on.
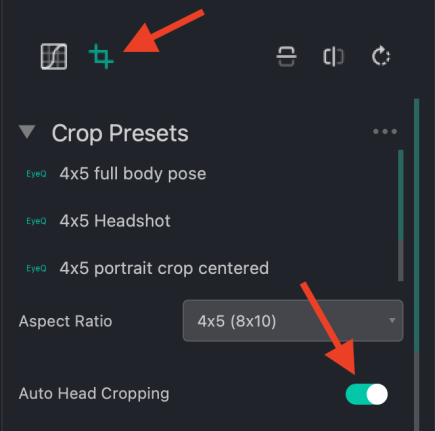
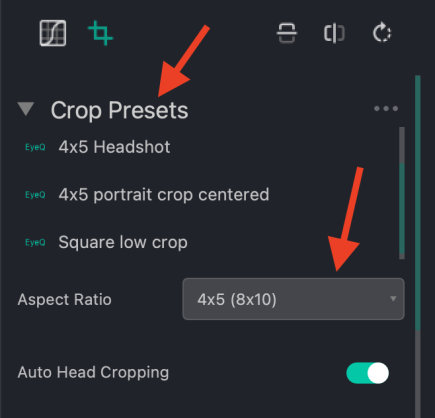
3. Choose your crop. You can do this by choosing a “Crop Preset” or by choosing an aspect ratio. Crop Presets make it easy to set your usual cropping parameters for repeated use.
Note: the “Custom” option under “Aspect Ratio” allows you to enter your own aspect ratio.
4. Move and/or resize the box over the image to set your desired crop positioning. This can be done on any image and is what the crop will be based off of for the rest of the job.
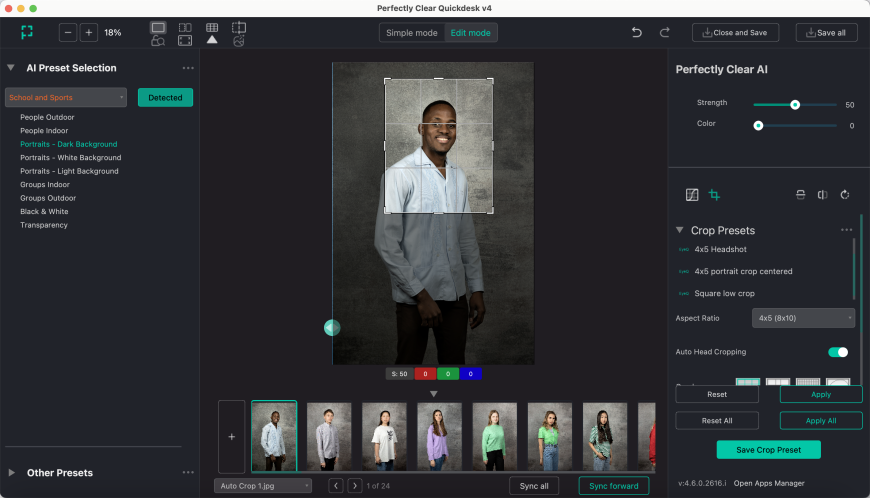
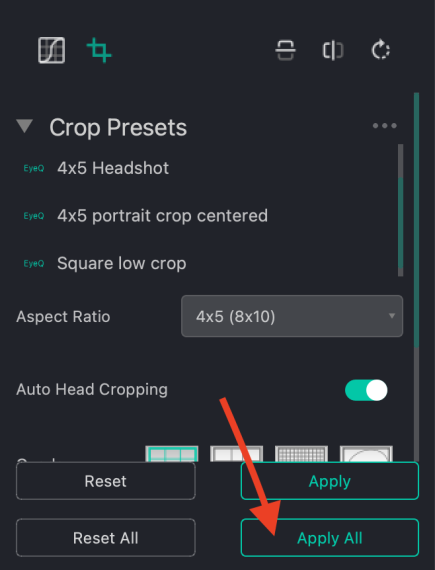
5. Click “Apply All” to apply auto crop to all images.
6. Review your images to ensure all images are cropped to your liking. If you’re happy with the page, click “Save/Next Page” to save your images and go to the next page.
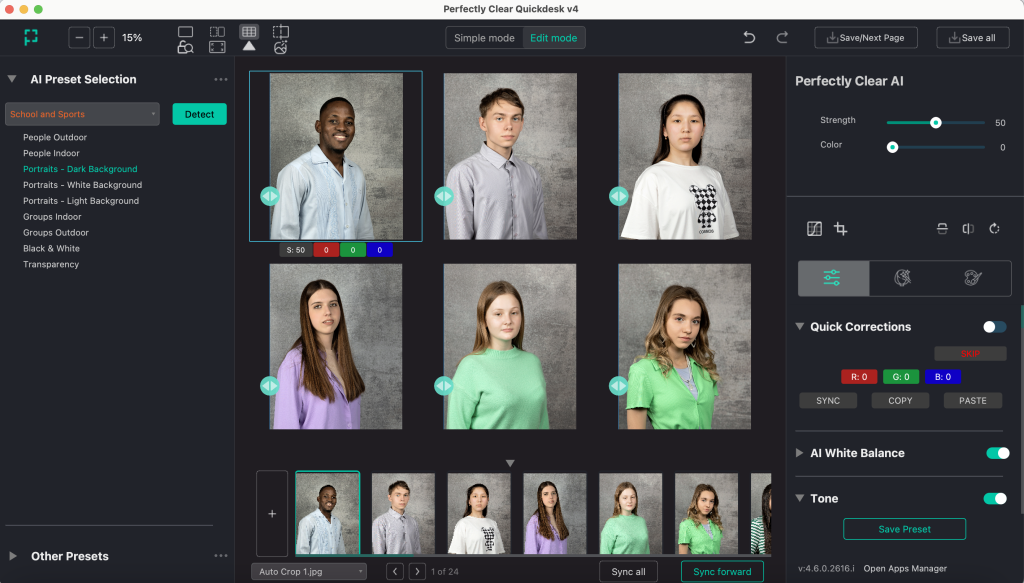
7. If you need to edit a crop, simply select your photo, go back to the cropping widget, make your changes, and click “Apply.” Note: If you click “Apply All,” it will re-crop your other images. Make sure to only click “Apply” when tweaking an individual image.

Happy cropping! If you have any questions or would like a demo, please contact us at any time.