With our new integration with Kodak DP2, you can choose to process your images with Perfectly Clear in one of two ways: In...
Read moreHow do I save a custom preset or AI Preset Group?
Presets can be tweaked according to your preferences and saved in Workbench and QuickDesk.
You can save your preset in one of two places:
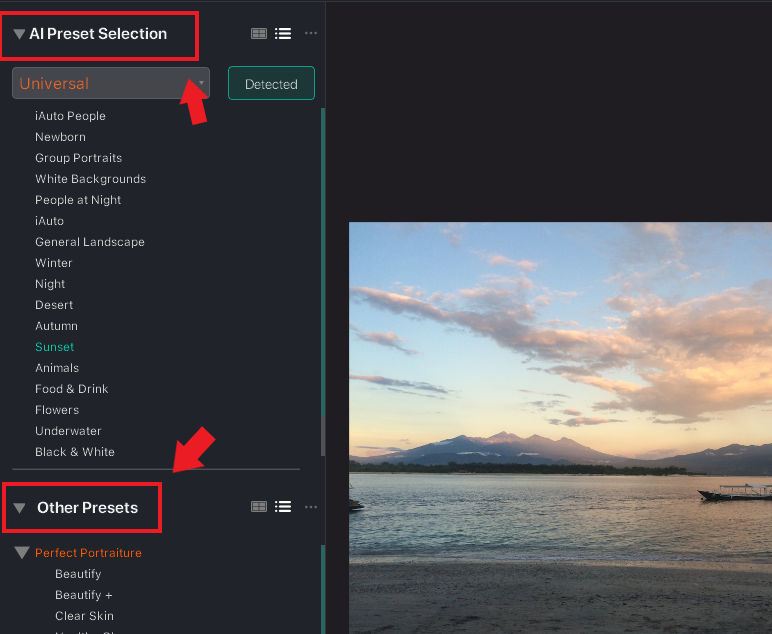
AI Models and AI Scene Detection: These sections uses machine learning to detect image content and scenes, and then automatically applies a specific preset based on what scene is detected. In other words, different presets get applied based on the type of image that’s detected. If you’d like to apply your preset automatically for a particular scene, you should save it here.
Custom: Presets in the “Other Presets” section are not part of the AI Preset Selection technology, so they do not get applied automatically based on what scene is detected. These presets can be manually applied by clicking on them. If you wish to apply one preset to photos, regardless of scene, you should save it here.
How to Save a Preset in AI Scene Detection
Step 1: Clone an Existing AI Model
To save a custom preset in Al Scene Detection, you must first clone an existing AI Model. Choose which group you’d like to clone (Universal, Pro, School and Sports, and Attractions and Cruise Lines) from the dropdown menu under AI Models:
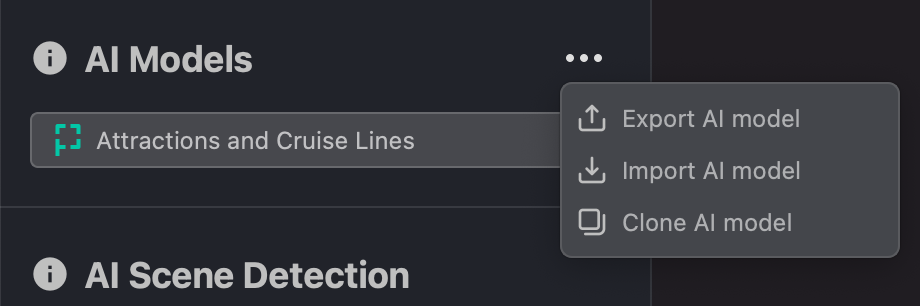
Then, open the menu with the three dots and choose “Clone this group”:
Lastly, name your new group:
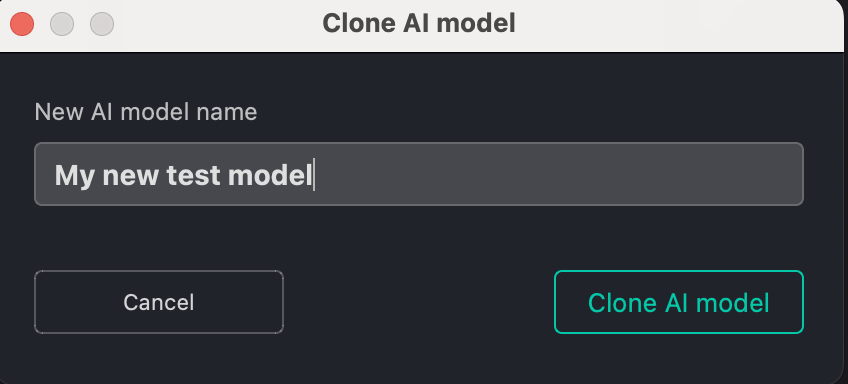
Note: be sure to choose a unique name! You can’t have more than one group with the same name.
Step 2: Load Your New Group & Tweak Your Preset
Once you’ve created your new group, find and select it from the dropdown menu under AI Preset Selection:
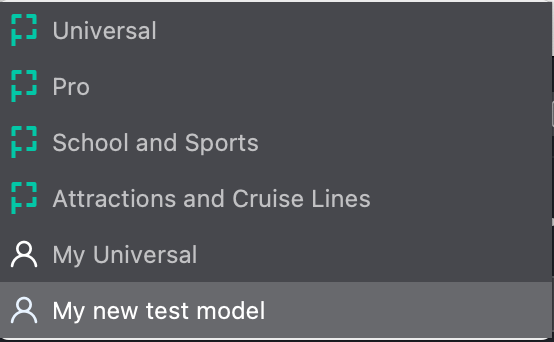
You can now customize any of the presets in this group by tweaking the settings in the right panel.
Step 3: Save Over an Existing Preset
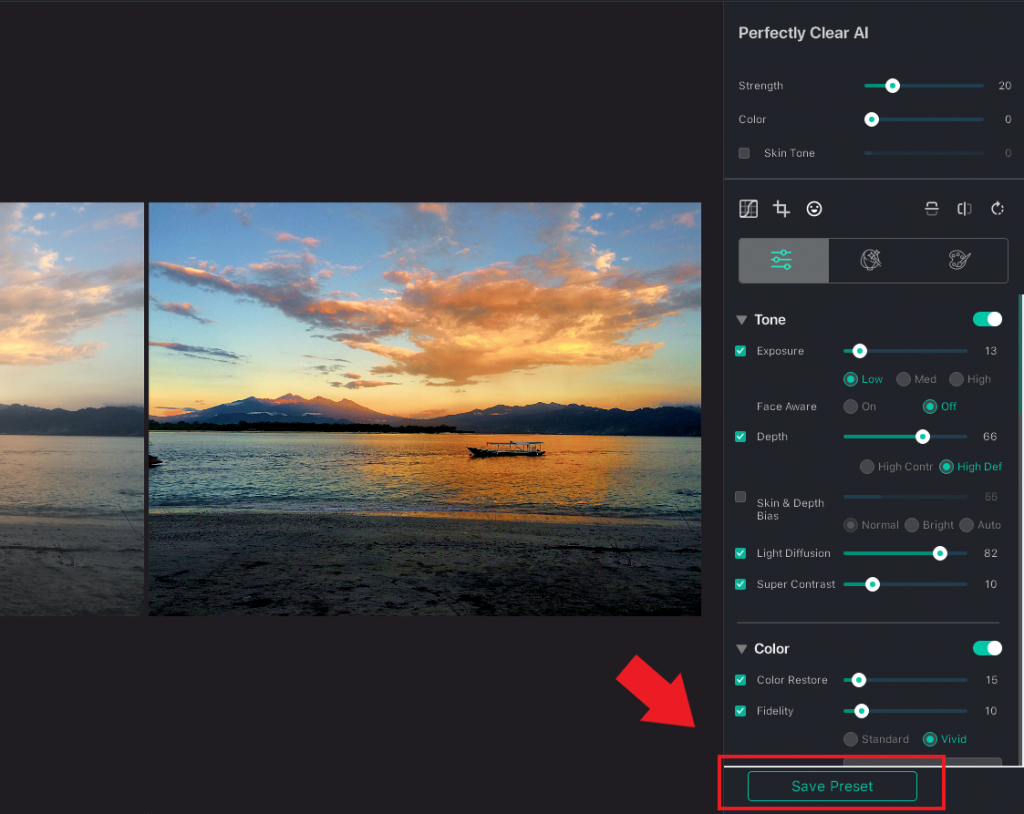
Once you’ve tweaked a preset, you must save it over one of the existing presets in your group. To do so, press the “Save Preset” button in the bottom right:

This will open several saving options:
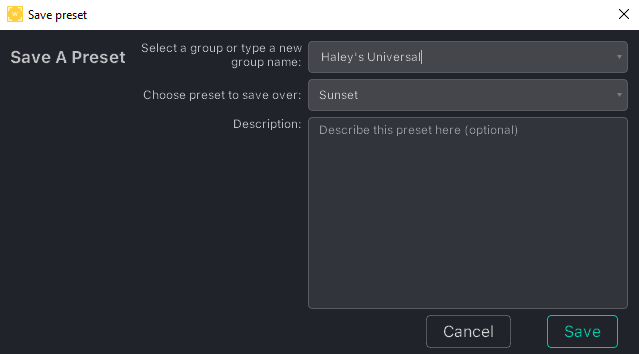
Select your group from the first dropdown menu.
Choose which preset you want to save over. The preset you were originally tweaking will be filled by default, but you can choose to save over any preset in the group. (You can also save your preset over multiple presets by repeating these actions).
Optionally, give your preset a description.
Then press, Save.
Voila! Your custom preset is saved. Now any time that particular scene is detected, your custom preset will be applied.
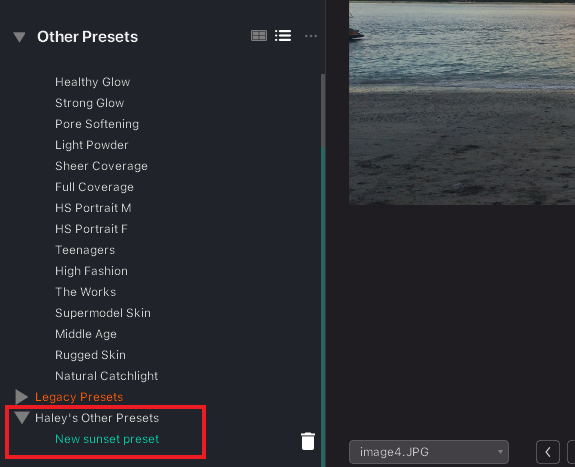
How to Save a Preset in Other Presets
Step 1: Tweak Preset & Press Save
Tweak your preset by adjusting settings in the right panel, then press the “Save Preset” button in the bottom right, which will open saving options:
Step 2: Create a New Group or Choose an Existing Group
Create a new group by typing your group name into the first dropdown field or select an existing group from the dropdown under the “Preset Folders” section:

Note: If you don’t have any existing groups in the Preset Folders section, you will need to type a new group name.
Step 3: Save over an Existing Preset or Create a New Preset
You can save your preset over an existing preset or save it as new. To save over an existing, choose which preset you want to save over from the dropdown. To save as new, type a new preset name.
Optionally, give your preset a description.
Then press, Save.
Your preset should now appear in the “Other Presets” section.