


The maximum image size for Background Removal is 5000 pixels on the longer edge, or 30 megapixels. Images that are larger than this...
Read moreWorkbench V6 User Guide
Workbench is a desktop application that lets you evaluate the powerful capabilities of Perfectly Clear automatic image correction technology in real time. It also allows you to fine-tune corrections and create your own custom presets.
If you’re using Workbench version 5.0 or later, start with our video Introducing Workbench V5, which provides an overview of the interface and core features. You can then refer to the guide below for detailed instructions on navigating and using Workbench V6.
If you’re using Workbench version 4.9 or earlier, we recommend upgrading to the latest version to take advantage of new features and improvements. For information specific to earlier versions, please see this video and visit our FAQ page.
- What’s new in Workbench V6
- Preset Management
- Installing Workbench
- Navigation overview
- Main panel controls
- Top panel controls
- Left panel controls
- Right panel controls
- Other tools
What’s new in Workbench V6
Workbench V6 introduces Retouching 2.0, which is our most powerful retouching engine yet. It delivers more robust and precise detection, more natural results, and overall higher image quality.
How are presets handled?
- All default presets will now use the new Retouching 2.0 engine
- Custom presets will continue to work. The results will be different, but subtle, and overall better. That said, please reach out to your Solutions Architect if you require them to be re-created.
Installing Workbench
Run the automated installer.
- If you are a first time user, or your current version is v4.x or earlier:
- If you do not have a download link, please contact your Solutions Architect or request one here.
- Once you have the link, simply go to the download page and download the installer
- Install the application
- If you are on workbench v5, simply click “Update” when you get the auto-update pop-up
1. Activate Your License Key
A valid license key is required to use Workbench beyond the trial period. If you have not already received a license key, contact your Perfectly Clear account representative or reach out to us here.
Once you have your license key:
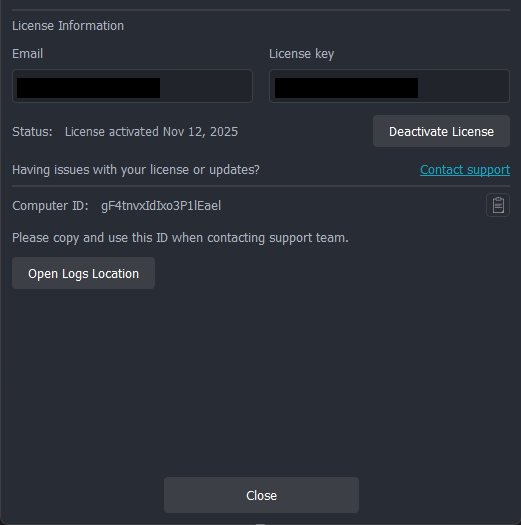
- Click the version number in the lower-right corner to open the Manage App screen.
- In the License Information section, enter your email address and license key.
- Click Activate License.
Navigation overview
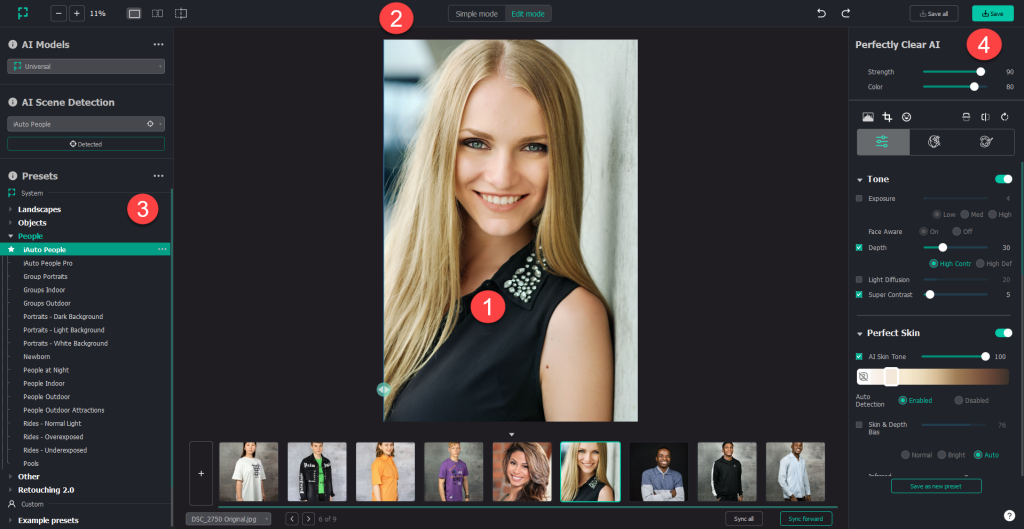
Workbench is organized into four main sections:
- Main Panel – where you add and view images. Any image added to Workbench is automatically corrected upon import.
- Top Panel – provides viewing and workflow controls, including zoom options, before/after comparison views, Simple and Edit modes, and buttons for saving images.
- Left Panel – displays AI Models, Scenes, and Presets, allowing you to manage and apply them efficiently.
- Right Panel – contains all image correction controls, including Core Corrections, Retouching, and Creative Filters, as well as additional tools such as auto crop and face detection.
Main panel controls
Adding Images
You can add images to Workbench by dragging and dropping them into the main window or by clicking to open files. To add additional images after your initial import, click the “+” icon in the lower-left corner.

Navigating Through Images
You can select a specific image by clicking it directly or by opening the image dropdown menu and choosing an image from the list.
To move through images sequentially, use the on-screen left and right arrows or the corresponding arrow keys on your keyboard.

Sync all/sync forward
Sync all applies the current correction settings to all images loaded in Workbench.
Sync forward applies the current settings to all images that follow the currently selected image.
Top Panel Controls
Zoom In / Zoom Out
Allows you to zoom in and out of the image for closer inspection.
Before / After Views
Provides multiple comparison views with sliders to easily compare the original image with the corrected version.
Simple Mode / Edit Mode
Offers two viewing modes:
- Simple Mode is ideal for quickly reviewing images without making adjustments.
- Edit Mode provides full editing capabilities, allowing you to fine-tune corrections and manage presets.
Undo / Redo
Lets you undo or redo any edits or adjustments made to an image.
Save / Save All
Allows you to save the currently selected image or all images loaded in Workbench.

Left panel controls
Perfectly Clear core corrections are built around three interrelated concepts: AI Models, Scenes, and Presets.
AI Models
AI Models use machine learning to detect and categorize images into scenes, then automatically apply optimized presets for each scene. Each AI Model contains multiple scenes, with targeted presets designed for those image types.
Perfectly Clear provides four default AI Models—Universal, Pro, School and Sports, and Attractions and Cruise Lines—each tailored for different types of imagery. You can view a detailed description of each AI Model and the presets it includes here.
The AI Model dropdown displays:
- The four default Perfectly Clear AI Models (identified by the green Perfectly Clear icon)
- Any custom AI Models you create or import

Cloning AI Models
Cloning an AI Model is useful when you want to customize presets while preserving the original, out-of-the-box model.
To clone an AI Model:
- Select the AI Model you want to clone from the AI Model dropdown.
- Click the three-dot menu next to the model.
- Select Clone AI Model.
- Enter a name for the new AI Model.
Note: AI Model names must be unique. You cannot have multiple models with the same name.
Scenes
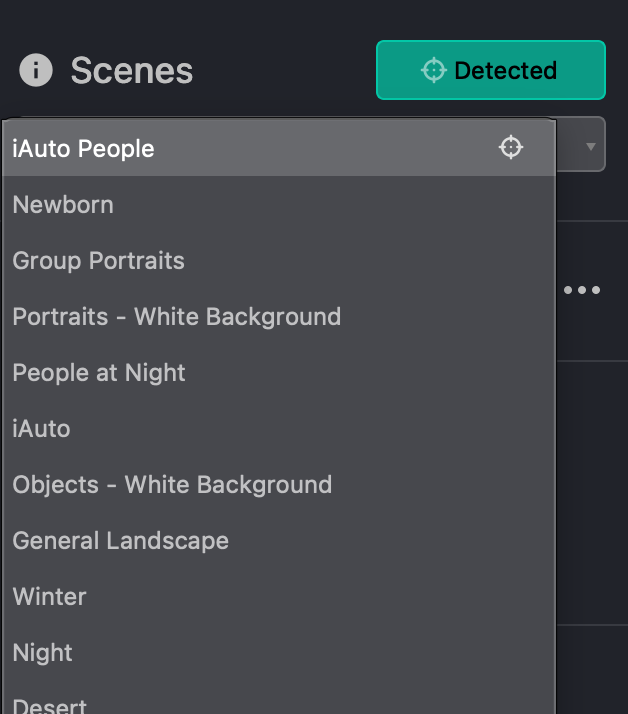
Scenes represent the categories an image may belong to, such as Sunset or Newborn. By default, the scene shown is the one the current image was categorized into.
- The Scenes dropdown lists all scenes within the selected AI Model.
- The detected scene is marked with a target icon. This indicates the scene automatically assigned to the current image and cannot be changed.
- The selected scene is highlighted with a green bar. By default, the detected scene is also selected, but you may select a different scene to preview or adjust its presets.
- When the detected scene is selected, the target icon appears white.
Scenes themselves cannot be edited or modified; however, the presets associated with each scene can be customized.
Presets
Presets are predefined collections of settings—such as color, exposure, and contrast—that can be applied to an image to achieve a consistent visual result. The highlighted preset is the one currently applied to the image.
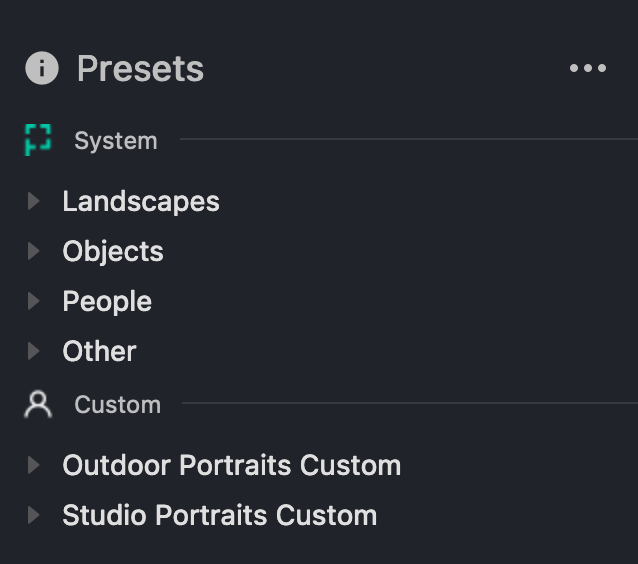
Presets are organized into groups. There are two types of preset groups:
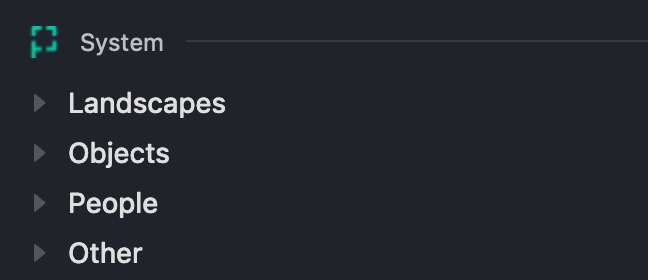
- Perfectly Clear preset groups, indicated by the green Perfectly Clear icon.
- There is one group for each default AI Model (Universal, Pro, School and Sports, and Attractions and Cruise Lines).
- Default Perfectly Clear presets and groups cannot be edited.
- Custom preset groups, indicated by the person icon.
- By default, no custom groups exist.
- Custom presets and groups can be edited, added, or removed.
Default Presets
A default preset is automatically applied whenever a specific scene is detected and is indicated by a star icon.
To change the default preset for a scene:
- Hover over a preset and click the star icon that appears on the left, or
- Click the three-dot menu next to the preset name and select Set as Default.
Note: Default presets for Perfectly Clear AI Models cannot be changed. To modify defaults, you must first clone the AI Model and work within the custom version (see Cloning AI Models above).
Exporting Presets
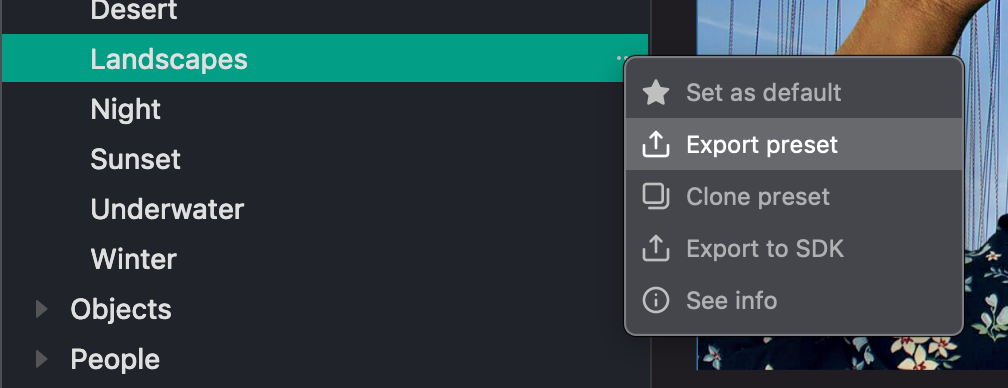
You can export either an entire AI Model or an individual preset.
- To export an AI Model:
- Select the AI Model from the AI Model dropdown.
- Click the three-dot menu.
- Choose Export AI Model.
- To export an individual preset:
- Select the preset you want to export.
- Click the three-dot menu next to the preset.
- Choose Export Preset.
Importing Presets
You can import a single preset, a group of presets, or an entire AI Model.
- To import a preset or preset group:
- Click the three-dot menu in the Presets section.
- Select Import Preset/Group.
- Browse to the desired file(s) and import them.
- To import an AI Model:
- Click the three-dot menu in the AI Models section.
- Select Import AI Model.
- Browse to and select the AI Model to import.
Right panel controls
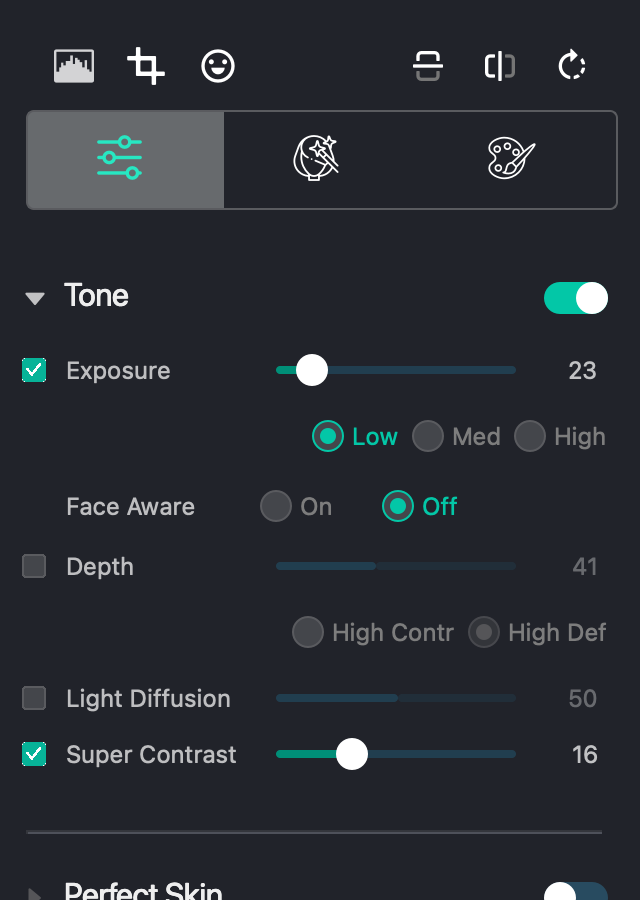
The Right Panel is where you adjust photos and presets. It is organized into 3 sections
- Core Color Correction: Improves image accuracy by correcting color balance, removing color casts, adjusting exposure, and recovering highlights for natural-looking results.
- Retouching: Automatically enhances portraits with dark circle reduction, skin smoothing, and teeth whitening.
- Creative LOOKs – A collection of stylized photo and video filters based on Look-up Tables (LUTs). It includes modern color looks, black-and-white treatments, and film-inspired styles. LOOKs can be applied with a single tap.
Tool Groups & Controls
Within each tab, tools are organized into groups.
Use the slider to control the strength of each tool. Higher values apply stronger adjustments. A value of zero applies no correction.
Use the toggle next to a group name to turn the entire group on or off.
To enable or disable an individual tool, check or uncheck the box next to its name.

Saving Presets
To save a preset after making adjustments:
- Click Save Preset in the lower-right corner.
- Select the preset group where you want to save it.
- Enter a name for the preset.
- (Optional) Add a description. You can view this later by selecting See Info from the three-dot menu next to the preset name.
Other tools
Auto Crop
Automatically crops images to maintain consistent head sizes and eye alignment. See the Workbench documentation for instructions on testing Auto Crop.
Face Detection
Displays detected faces in the image.
- Eyes appear green when open and red when closed.
- Mouths appear green when smiling and red when not.
Flip & Rotate
Allows you to flip or rotate the image.

For any further questions regarding Workbench, you can always contact your Solutions Architect or get in touch with us here.